The Complete Guide to Dismantling & Reassembling All Wardrobe Types
Wardrobes are one of the trickiest pieces of furniture to move when relocating or reorganising your home. Whether it’s a single-door wardrobe, a four-door sliding wardrobe, or something even larger, disassembling it correctly is crucial to avoid damage and make reassembly easier.
In this guide, we’ll walk you through how to dismantle and reassemble different wardrobe types, what tools you need, the challenges you may face, and how to protect your wardrobe parts. If you’d rather not handle it yourself, MNM Removals offers a professional wardrobe dismantling and reassembly service at an affordable price!
🛠️ Tools You’ll Need for Wardrobe Dismantling & Reassembly
Before you begin, make sure you have the right tools to make the process smooth:
✔ Screwdriver Set (Phillips & Flathead)
✔ Allen Keys (Hex Keys) – Often required for IKEA and flat-pack wardrobes
✔ Cordless Drill – Speeds up the process for larger wardrobes
✔ Rubber Mallet – Helps gently separate panels without damage
✔ Masking Tape & Marker – Label parts to make reassembly easier
✔ Small Bags for Screws & Fittings – Prevents losing small pieces
✔ Protective Blankets or Cardboard – Protects wardrobe panels from scratches
General Tips for Dismantling & Reassembling Any Wardrobe
✅ Clear the Surrounding Space – Move other furniture to give yourself enough room.
✅ Empty the Wardrobe First – Remove all clothes, shelves, and drawers.
✅ Take Photos Before Dismantling – Helps you remember how to put it back together.
✅ Work with a Partner for Large Wardrobes – Heavy or sliding wardrobes require two people.
✅ Store Screws & Fixings in Labeled Bags – Makes reassembly much easier.
🔹 How to Dismantle & Reassemble a Single-Door Wardrobe
Dismantling a Single Wardrobe
1️⃣ Remove Doors – Unscrew the hinges carefully and set the door aside on a blanket.
2️⃣ Take Out Shelves & Drawers – If they’re fixed with screws, unscrew them first.
3️⃣ Detach Back Panel (If Applicable) – Some wardrobes have a nailed-on back panel that may need careful removal.
4️⃣ Separate the Sides & Top Panel – Use an Allen key or screwdriver to detach the side panels and the top.
Reassembling a Single Wardrobe
✔ Start by securing the side panels to the base.
✔ Attach the back panel and shelves before placing the door back on.
✔ Tighten all screws but don’t overtighten to prevent damage.
🔹 Difficulty Level: Easy ✅
👥 Recommended People: 1 person
🔹 How to Dismantle & Reassemble a Double-Door Wardrobe
Dismantling a Double Wardrobe
1️⃣ Take Off the Doors – Remove the hinges and set doors aside carefully.
2️⃣ Remove Shelves & Hanging Rails – Unscrew any fitted shelves or rails inside.
3️⃣ Detach the Back Panel – If nailed or screwed in, remove it carefully.
4️⃣ Unscrew the Side Panels & Top – Lay each piece flat to prevent damage.
Reassembling a Double Wardrobe
✔ Start by fixing the side panels to the base.
✔ Attach the back panel securely.
✔ Reinstall shelves, rails, and doors.
🔹 Difficulty Level: Moderate ⚠️
👥 Recommended People: 1-2 people
🔹 How to Dismantle & Reassemble a 3-Door Wardrobe
Dismantling a 3-Door Wardrobe
1️⃣ Remove the Doors – Carefully unscrew and store hinges and screws safely.
2️⃣ Take Out Internal Fittings – Remove shelves, rails, and drawers.
3️⃣ Detach the Back Panel – Unscrew or pry off gently.
4️⃣ Unscrew the Side & Middle Panels – This structure may have a central support, so take care when disassembling.
Reassembling a 3-Door Wardrobe
✔ Secure the base and side panels first.
✔ Attach the middle section, back panel, and shelves.
✔ Fix the doors and adjust hinges for proper alignment.
🔹 Difficulty Level: Challenging ⚠️⚠️
👥 Recommended People: 2 people
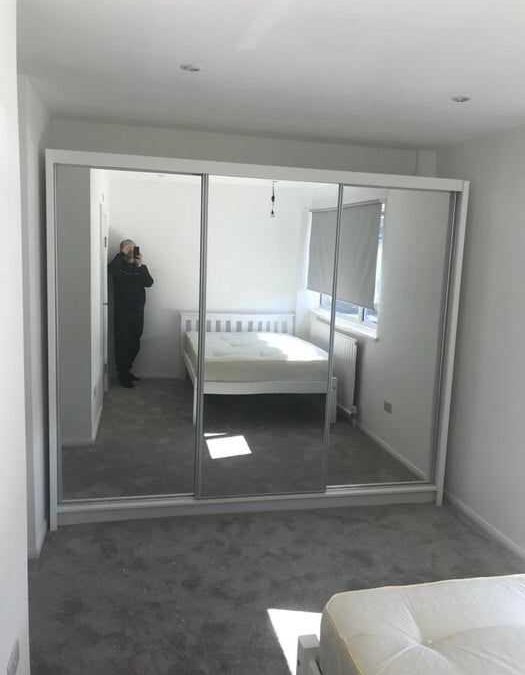
🔹 How to Dismantle & Reassemble a 4-Door Sliding Wardrobe
Dismantling a Sliding Wardrobe
1️⃣ Remove Sliding Doors – Lift each door up and tilt outwards to remove.
2️⃣ Detach Tracks & Railings – Unscrew top and bottom tracks carefully.
3️⃣ Take Out Internal Components – Remove shelves and hanging rails.
4️⃣ Disassemble Side Panels & Backboard – Lay each piece flat for protection.
Reassembling a Sliding Wardrobe
✔ Secure the side panels and attach the backboard first.
✔ Fix internal fittings before installing tracks.
✔ Carefully reattach the sliding doors last.
🔹 Difficulty Level: Advanced ⚠️⚠️⚠️
👥 Recommended People: 2+ people
🔹 Common Challenges & How to Overcome Them
🔸 Loose Screws or Missing Parts? – Keep all fittings in labeled bags for easy retrieval.
🔸 Panels Won’t Align? – Ensure screws are not overtightened before adjusting.
🔸 Heavy Components? – Use two people for large wardrobes to prevent breakage.
🔸 Scratches & Damage? – Wrap panels in blankets or cardboard to prevent scratches.
🛠️ Need Professional Help? MNM Removals Offers Wardrobe Dismantling & Assembly!
If you’re struggling with dismantling or reassembling your wardrobe, let MNM Removals do the hard work for you! Our trained movers specialise in:
✔ Dismantling & Reassembling All Wardrobe Types
✔ Careful Handling to Prevent Damage
✔ Fast & Efficient Service at Affordable Prices
📞 Call MNM Removals Today on 0800 0025 543 a Free Quote!
🌐 Visit www.mnmremovals.co.uk to Book Your Service Now!
🎉 Wardrobe Dismantling Made Easy – Let Us Handle Your Wardrobe Services! 🎉
